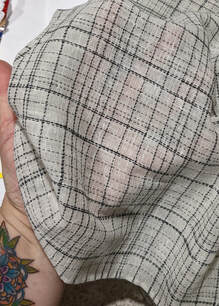
The Garment constructionAs we play SCA here in the Southern United States where it can be hot and humid, I thought for September at an event that is known for being physically draining because of the heat, I found a delightful, light-weight, loose weave linen that would make a comfy medieval under dress. Add to that the over gown would be silk... this linen fit the bill.
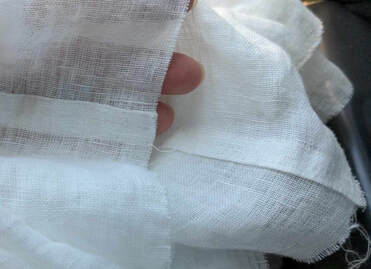
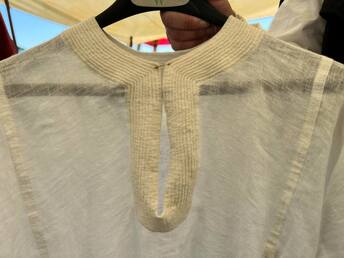
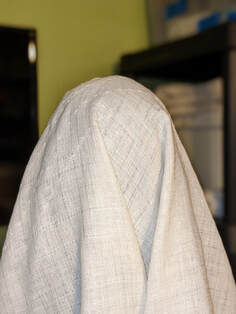
You can see from the picture of the finished under dress this fabric is quite sheer, and the loose weave makes it more delicate. Not less strong, but I did need to take this into account in my decisions.
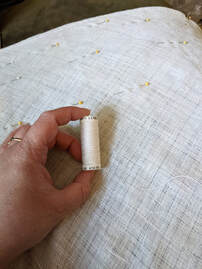
One of the key choices I made, that I believe led to the success of the project, was I chose to hand stitch the entire garment. This is a first for me! Before this I have hand finished cuffs and necklines, or fixed seams and such, but never before had I sewn an entire garment by hand. This decision was driven by the inability to use a machine while traveling in a vehicle.
I am thrilled though because the fabric choice paired with hand sewing made for sturdy and graceful seam treatments. The individual threads of the linen are strong, but the weave is loose. So I used a combination of flat felled seams and french seams, and added a third row of stitching to help with stability and resist pulling.
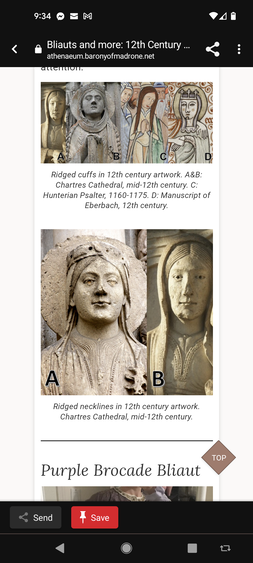
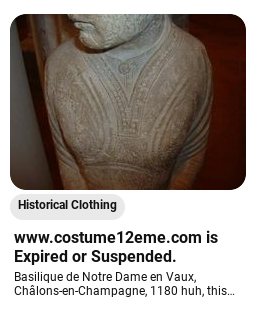
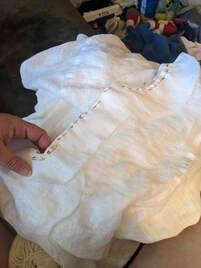
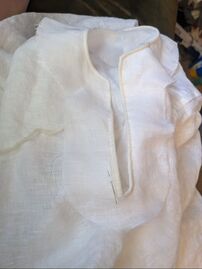
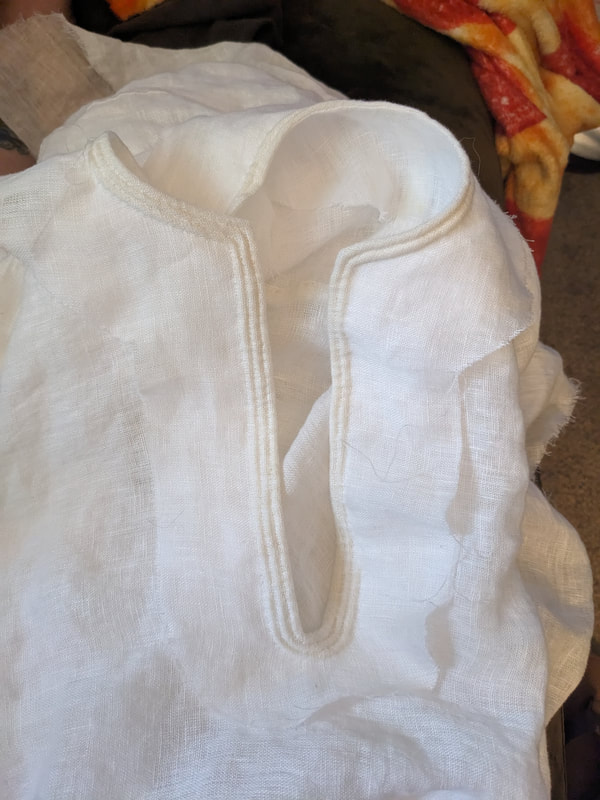
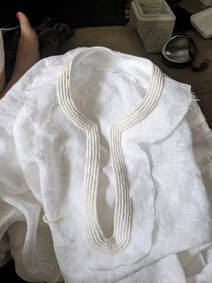
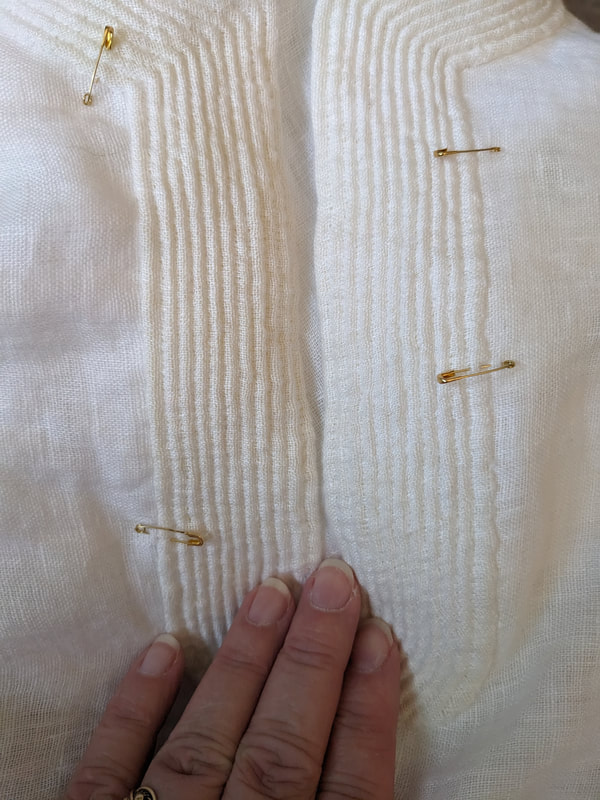
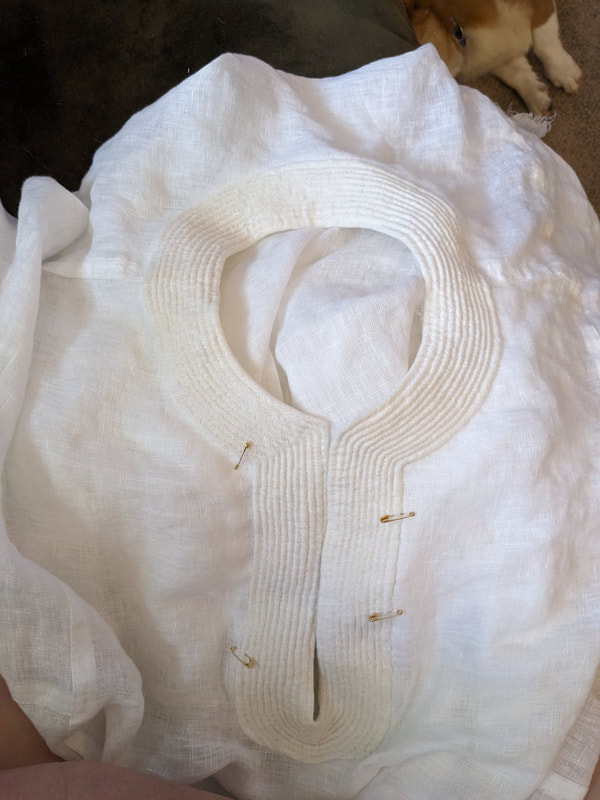
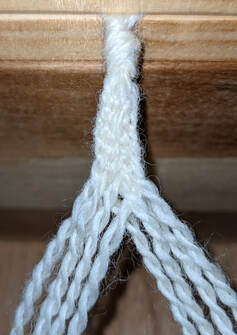
The entire garment was sewn, apart from side seams, before THE trapunto even began.Trapunto necklineBasing the shape on both the extant examples and the neck of the Lady M inspiration dress I chose to do a snug keyhole neck. I did a full binding; that is to say both an inside and outside facing for the collar. This provided stability to the fabric and allowed it to support the many stitches of quilting.
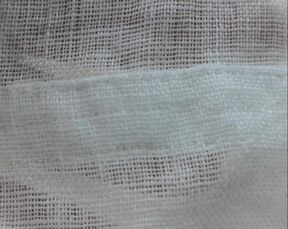
After stitching the facings together and turning it right side out, I fitted it around the neckline. And then began the consecutive rows of woolen cording stitched in place. Below is pictorial documentation.
I did not count how long this garment took to construct... but two cross country drives and all of Suits; plus some more. It turned out exactly like I imagined. It fits! AND it carries the LOOK of the period Trapunto examples. I call this a success.
Sources
Materials
0 Comments
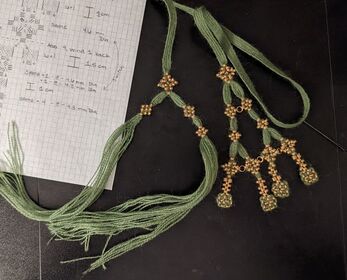
I am in the process of making a set of golden temple ornaments for HRM Yasmin Farrah...
These will be special as I am incorporating a few things to make these a custom creation.
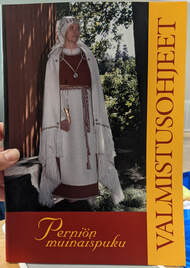
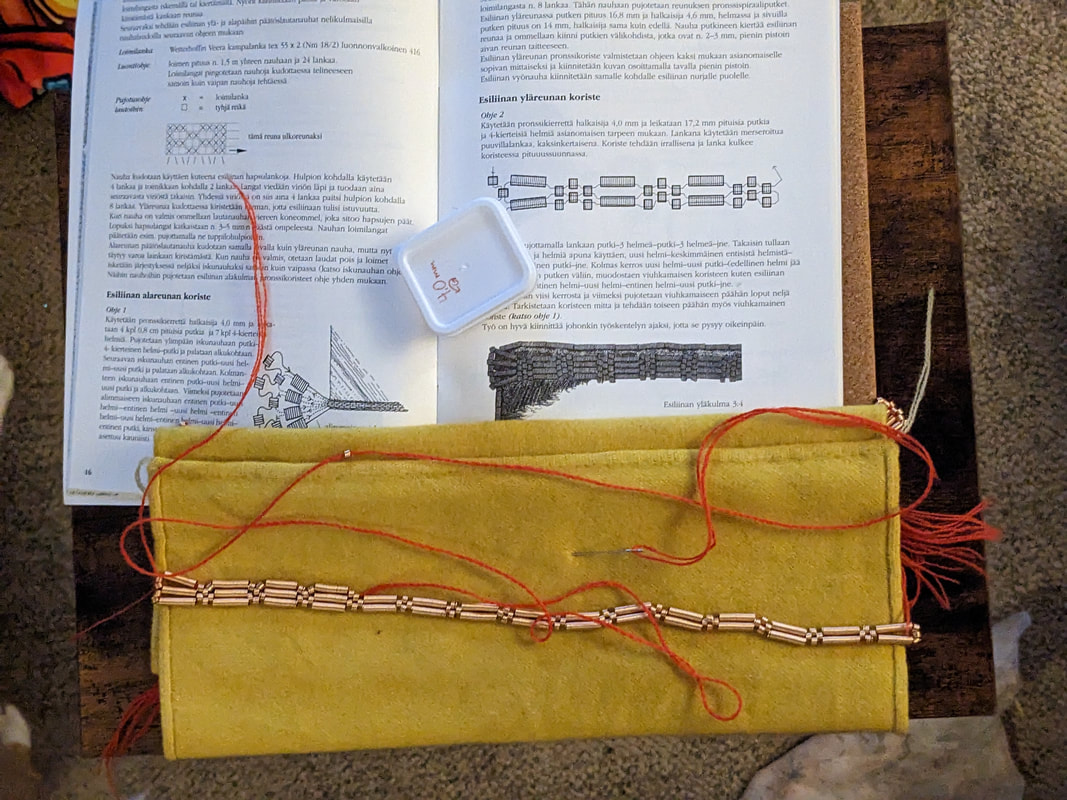
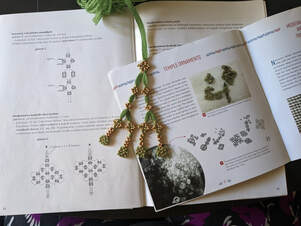
MaterialsI began this apron before I had my hands on the book Löydöstä Muinaispuvuksi (NEW! 2021) which covers ... umm, well, everything. I couldn't wait any longer for the English version and decided to use my translation muscles. The authors did a wonderful job and anyone that is interested in creating the clothing of ancient Finland will want a copy, even in Finnish! So I used what I had to proceed- the Perniön muinaispuku booklet, documents and discussions from the Iron Age Finland FaceBook group, lectures by Mervi Pasanen, pictures of pieces in museums and so forth. The problem with the Perniön muinaispuku booklet is many of the instructions and how-to's, well, some are now recognized as incorrectly interpreted (like the forehead dangles instead of temple ornaments). The booklet still contains great pictorial information and instructions, and I use Google Translate, and logic to translate Google translate, to understand the descriptions.
I know from previous knowledge absorbed through these sources that wool, particularly 2/2 twill but also other twill and plain weave too, seem to be what the majority of Iron Age Finnish clothing is made from. Though newer research points towards the possibility that the under layers are made from linen/or plant fibers. I mean... itchy bottoms from pokey wool? no thanks.
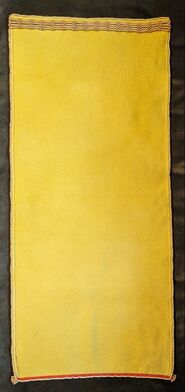
And, just like the crewel embroidery wool from SAFF that I used for the Codex Manesse garters, and the brick pattern bands on the aprons, I got this twill wool cloth at SAFF too. This is a 2/1 twill, of a light weight merino wool, in a beautiful golden color that is achievable through ancient dye stuffs.
For the coil string, I tried to match the fabric color to the wool thread I had on hand since I didn't have the warp or weft threads to match. The exception here is the red cording I used for the applique piece at the waist; I used the same red wool as the brick pattern tablet band. Red wool has been found as the threading for other applique pieces and I thought it added symmetry.
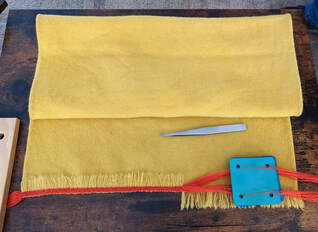
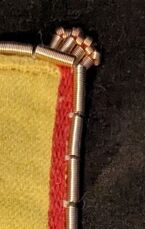
Making the ApronI did my best to approximate the tubular selvage edges found in most Iron Age Finnish finds; As it turned out this is the guidance provided in the Löydöstä Muinaispuvuksi book if you cannot weave your own cloth, or have it woven for you. This was done simply by making a very narrow hem on each edge; though I did pull some warp threads to help give the appearance of the pattern for a tubular selvage. (I'm not sure I would do this again. it doesn't add enough of a difference to be really noticeable.)
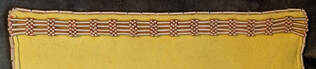
See in the picture with the tan colored brick band? See the wrinkles? That means the band tension was too tight... so I wanted to re-do the tension... and besides, that grey/tan color was bland and bleh. High contrast there I went! Red I knew would work well, since the tablet woven band that accompanies this apron is white and red. (But I didn't know until after the project was done that the original interpretation of the belt was yellow and red.) To my modern eye, I much preferred the red/yellow contrast.
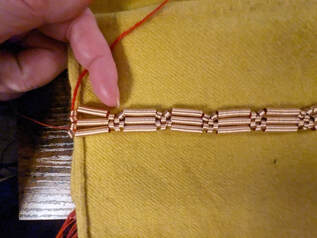
All the coils were nextYou know how sometimes you can get so focused on a project you miss details? or as the saying goes, you can't see the forest for the trees? Well. Just as my applique piece was finished and I could start to attach it to my apron... I realized my applique did not match the pictures in the Perniö booklet or source pictures for how this applique looks; even though I followed the threading directions, which are pretty straight forward.
So guess what I did?! yep. I pulled all of the coils off, and started again on row 2. It really didn't take that long, and I really wanted it right.
On row 2 I figured out the issue. aaaand, now after looking things over... I probably could have completed the original and then flipped it over. /facepalm There is the forest and trees part. However, if I had not redone it, I couldn't have re-organized and made better fitting, more uniform columns. So I still feel it was well used time and a good learning experience.
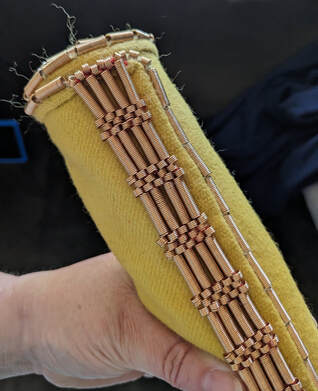
The applique piece is then centered and sewn onto the waist of the apron below the top edge. Because it is heavy, the goal here is to secure the applique piece in place and support the weight. I sewed this similar to how the edge coils are attached, by stitching down the cord that runs through the coils; the sewing thread/yarn also helps by providing extra support as it travels through the coils as well. Although, unlike the coils on the apron edge, a stitch was not needed between every coil bead.
I began stringing and sewing the bronze coils to the edge after the applique was attached. I did the top edge first, to make sure I used the proper sized coils, since they are different from the sides and bottom edge. These are also attached using the same method of strung on a braided cord, and then the cord is sewn to the edge. There are good instructions in the Löydöstä Muinaispuvuksi book, Mervi Pasanen's Instagram has a video, and the Perniön booklet does instruct that between coils is about a 2-3 mm gap for the stitch. pg 17
what would I change...There actually aren't many changes I would make to this project. I'm pretty darned happy with the outcome. That signals a pretty good project, right?
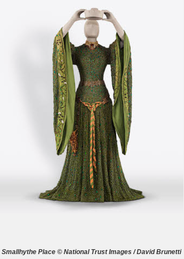
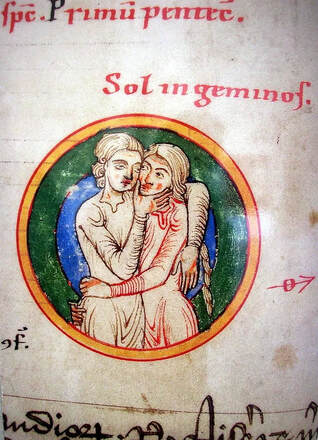
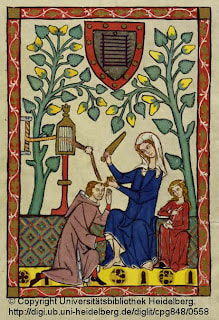
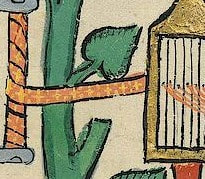
if you made it this far, thank you. I know I included a LOT of information. but maybe this will help someone with their project in the future. :)Late 2022 a dear friend sent out a call for assistance in making tablet woven garters pulled from the pages of the Codex Manesse ... and WHOOSH up my hand went. SURE! I wanted to make these for her, and what a splendid thing to recreate things from a manuscript. "The "Codex Manesse", also known as the "Great Heidelberg Book of Songs" (Cod. Pal. germ. 848), was created between around 1300 and around 1340 in Zurich and is the most comprehensive collection of ballads and epigrammatic poetry in Middle High German language." I knew these were being made for HER Codex Manesse project, to recreate a whole outfit!, so I wanted to do it right. What I didn't know at the time was they were destined to be a part of her Elevation outfit in May 2023; I'm talking about Dame Cyneswyth the Quiet of the New Forest.
SO... where to start... Looking at the illustration I thought hmmmm a rigid heddle AND cards... ummm... this artist didn't know how to weave. And I'm not the only one who thought the same thing. But... is that even possible? I immediately chucked that idea out the window, and instead focused on drafting the pattern and getting to work. There is a fun article on Arachne's Blog Past & Present about the possibility of weaving with a rigid heddle as shown in the Codex. I found this blog AFTER I completed my project, and I would not have done it this way, but it is interesting to read about it. The Materials
The Pattern and weavingSo did I need 6 sided cards? Ehhh I decided to try to pattern with square, 4 hole cards first, because that is what I had on hand and I figured it is an easy pattern. I couldn't get GTT designer to work on my Chromebook so I started here as I had used this draft designer successfully before. I couldn't get the pattern to work with 4 hole cards. It is possible that someone with more tablet weaving and drafting experience than I could have done so. But I chocked it up to "Hey I guess the illuminator of the original did know or observe something of tablet weaving because BOOM designing the pattern with 6 hole cards was easy pea-sy. That is where the easy stopped.
OH MY. This pattern did NOT work. The short story... I have at least one foot of weaving trying to make this work. For whatever reason, it didn't. I consulted experts. Did I switch S/Z? Yep. Change directions? Yep. One shed or two? None of us could figure it out. so I went searching for a different pattern.
Insert the sound of Angels singing. Whatever the difference, it worked... and OH MY. Please go try TwistedThreads and their pattern generator. I'm in love. The tools are amazing, including an interactive pattern and, AND you can use it on your phone.
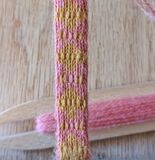
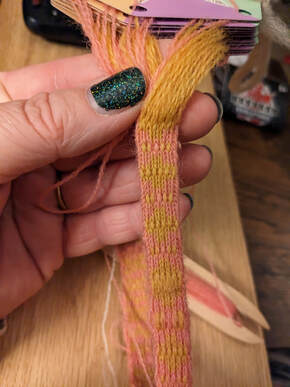
But you can see above, there was not a whole lot of contrast there to SEE the pattern. So we decided to change the color of the pink to the darker. This was definitely the right decision.
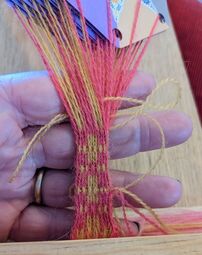
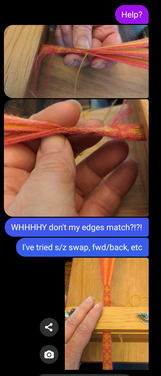
But now I had other challenges to figure out. What color works best for the weft? Well now the pattern is there, but why don't the edges match. one side looks like dots, and the other looks like spirals? Uuugh this is a puzzle. Is it my tension of the weft threads? No. Is it one weft thread wrapped in a spiral between the two sheds? or two separate shuttles that cross back and forth? Ok, I'll do TWO shuttles, in two separate sheds. Yes! that works! Eww that color doesn't! Oh, what about the Finnish tablet weaving technique of Tubular selvages? Yessss, that looks lovely.
Completed in timeY'all. This whole process of figuring out the pattern, the 6 hole cards, the colors, the this, the that... it took a solid month. yup. I said it, a month.
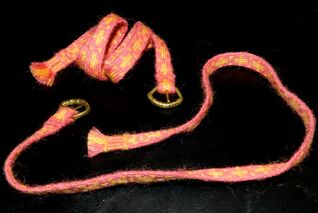
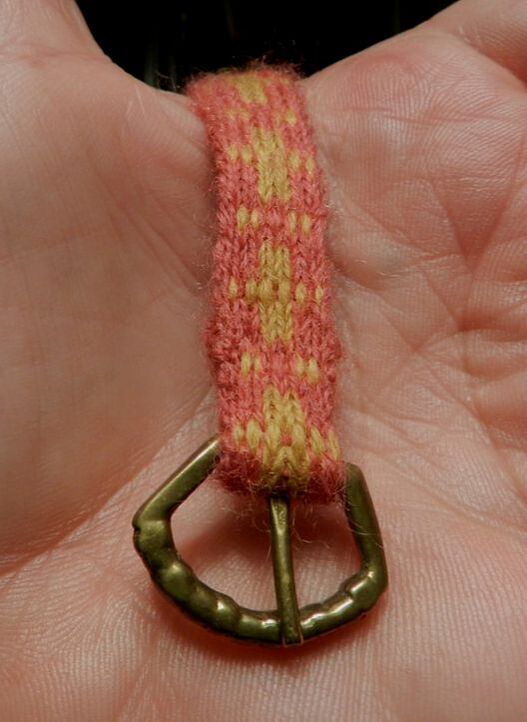
I am SO glad I didn't give up. I'm very happy I continued because the end product Cyneswyth said she felt she could pull out of the illumination. That fills my heart with joy that I could help make her dream of a complete outfit from the Codex Manesse come true.
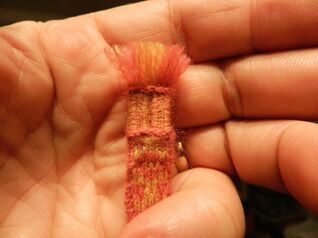
sister GartersRemember how I restrung/ threaded the colors? Well I thought... why waste?! I already have the pattern strung! I know! I'll make a sister set of garters! So I threaded dark pink where the yellow was. I've done the same plaited tassel ends, but used contrasting gold for the braid at the ends.
For these, I knew the pattern well by now, and instead of focusing on perfection, I just wove.
It was glorious. Besides the color, the biggest difference between this set of garters and Cyneswyth's was I did not weave tubular selvages on this second set. I find that ironic since *I* have the Finnish persona, not her. Why did I do this? I don't have a fabulous story or reason. Once I started and realized I wasn't doing the tubular selvage I just went with the flow and decided to keep any imperfections or mistakes, plus I was restricted on the length of the light pink after weaving feet of the original colors.
I knew the pattern well after weaving something like over 4 feet ... so I didn't make many mistakes.
I'm happy with my tensions both warp and weft. and look forward to wearing them.
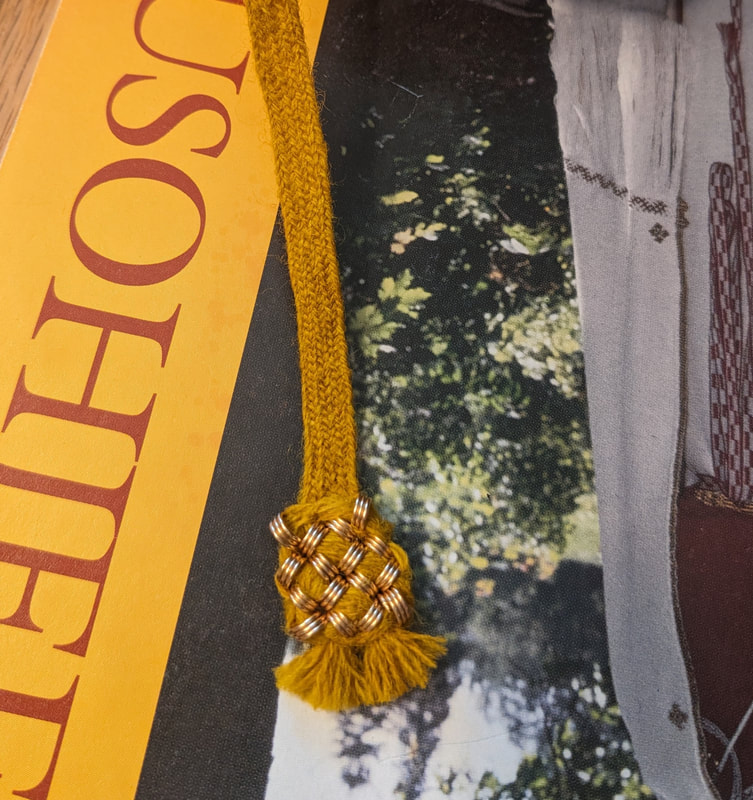
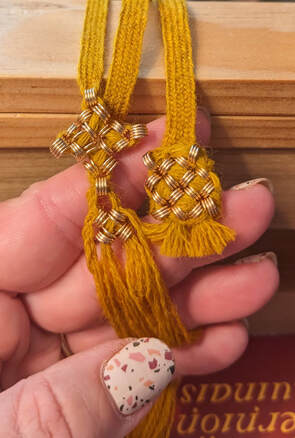
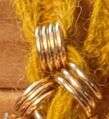
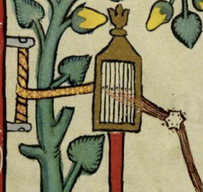
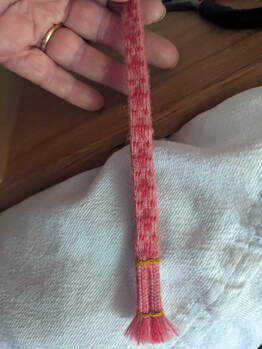
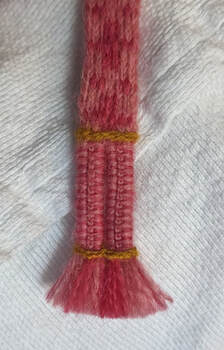
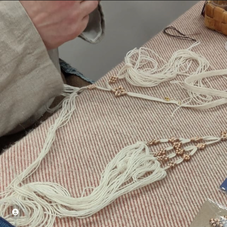
What is this?The coiled bronze wire spirals are threaded in patterns onto either end of a lattice braided band. This deceptively simple band is wool, using a finger weaving technique using 17 strands, and braided in a 2/2 pattern which creates a diagonal plaited look.
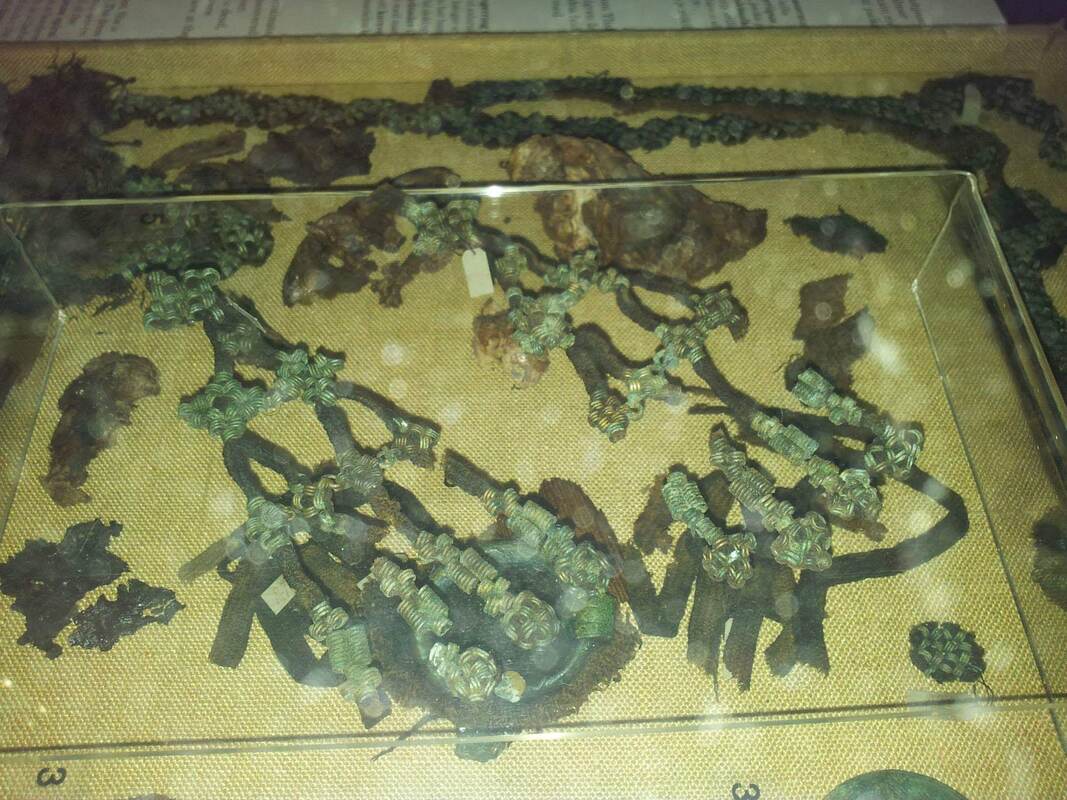
The band is a small 6mm wide, due to the tiny nature of the yarn used. The bronze coils are of 2 different diameters, 4.6 mm and 4.2 mm. Because the full detailed book is yet to be published this sizing is an educated approximation. I based the coil size on the pictures of the extant spirals of 41/2016, which includes a 1 cm scale gauge!, and other extant temple ornament examples like the Perniö headpiece which is firmly documented in size. The design and placement of the bronze coil patterns is based on the recreated Ravattula Costume Project (RCP) temple decoration pattern, and also my own observations of the extant coils and drawing of the X-rayed findings. For more please see the explanation in the Differences and Choices section.
How
materials2 ply wool, size “90 tex” equates to spinning size about 30 wpi, or #0 lace weight crewel embroidery size yarn.
Bronze wire; 22 gauge/ 0.54mm diameter Metal rods of varying sizes and a simple twisting gizmo; using a micrometer I determined the rod size needed, plus my wire mm x2, to determine the correct diameter of the coils. Differences and choicesI am very pleased with the outcome of my recreation. I know it doesn’t exactly match the RCP example, but I made choices to differ the design on purpose.
The only difference I think I could make would be to recreate one exactly like the RCP has; this is because they have hands-on experience with the extant pieces and access to information that is not yet publicly available. However, while examining the drawings of the X-rays I found that some of the coil design elements had been left off of the RCP temple ornaments. I have added that element in my temple ornament design. It is diamond in shape with an X cross in the middle. In a second temple ornament creation I decided to only use one of this diamond shaped design as in the x-rays it appears there is only one of this design that remains. I also moved it to a different location in threading as both locations are possible. The extant wool used is best equated to the Åland breed of sheep. I was not able to source this and so decided to use wool yarn in the proper size and ply instead of focusing on breed. I also made a different color choice of wool on purpose. All current recreations I am aware of, like those done for the Finnish National costumes, these headpieces are made of natural or white wool. I know color testing has been done of the Ravattula fibers, but with the book not published I can’t be sure the fiber analysis was done on the wool inside the temple ornament coils. Per SCA tradition in colors, because I am apprenticed, I chose to make this band in a green color. With permission from my Laurel, this head band can represent my apprentice belt so that I may recreate and wear the correct tablet woven and finger woven belts and aprons to match the different pieces of Iron Age Finnish finds such as Ravattula 41/2016, Perniö roughly grave 6, and Eura grave 56, and Lieto Ristinpelto grave 86. The Perniö book is entirely in Finnish. I do not speak or read Finnish, so part of this journey has been translating and making sense of the not quite right translations with which Google has given.
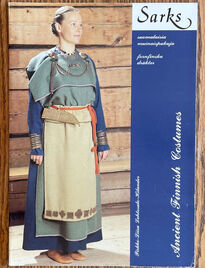
sourcesRavattula Costume: The Study of the Grave Find, booklet from Ravattula Ristimaki, www.ravattula.fi Perniön Muinaispuku, Valmistusohjeet, booklet in Finnish, Leader II. Mervi Pasanen; her FB posts & answering my many questions there, also instructional videos, pictures, and talks. Iron Age Finland, Group on Facebook platform. Instagram Ravattula, Lankakuiskaaja, swanmervi Special thanks to the group involved in the Ravattula Costume Project, the archeology, and their posts on Instagram. Sarks: Ancient Finnish Costumes IMHO anytime someone has the correct head gear on with an outfit, this helps immensely to make the outfit look like it has walked off of the pages of history. Any attempt at all can help. I have a passion for this... for anyone in any culture or time period.
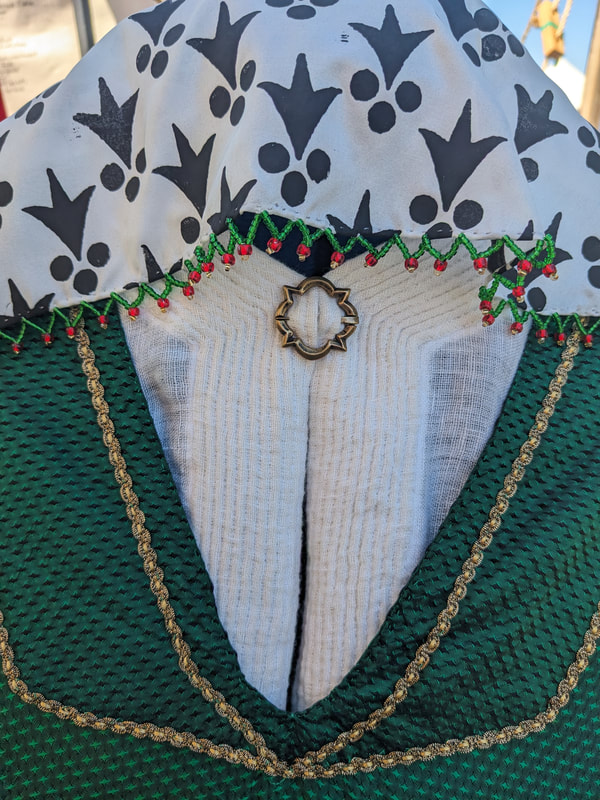
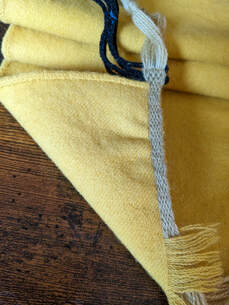
I have been lazy in my attempts with my iron age Finnish garb and using basic headscarf wraps, not the hood/veil being used in many of the recreated iron age garments. So in an attempt to up my game, I decided to make the correct hood/veil; sort of. I'll expand on that in a moment.
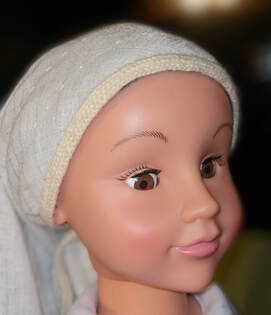
Summer Weight veilI live in the Southern United States. It gets hot and humid here year 'round; it is classified as humid subtropical. Whereas my Ravattulan persona, near Finland's southern coast, experiences a "humid continental climate [], with mild summers."1 But most of Finland is classified as subarctic. So "my" two climates are drastically different. It makes recreating items challenging, especially for summer. I decided, let me make the correct headgear, and I'll make the choice to use a loose weave, very light weight fabric.
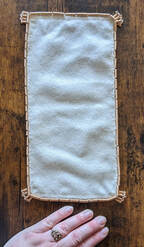
Looking into what fabrics I had on hand, I found a loose weave vintage cotton I got at an estate sale; the weave was not the correct 2/2 twill, and it had black strands woven through it... but it was a good off white/ natural color and was nice and light.
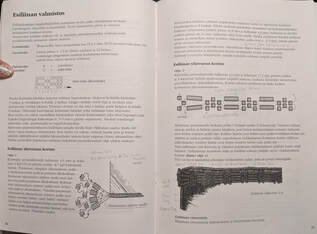
I measured out the size needed per my translation, 85 cm square... well a tad bigger so I had enough to hem... and began pulling out all of the black threads. uuuff that took a hot minute, but it was rewarding. Before stitching, I folded the square to create the triangle as shown in the booklet. Then with linen thread I sewed 5 lines of back-stitch to provide stabilization. This was not discussed in depth in the text of the booklet, but is shown pictorially. 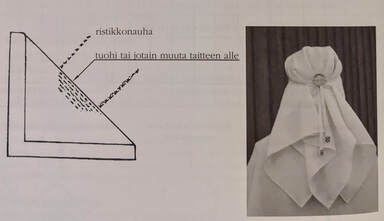
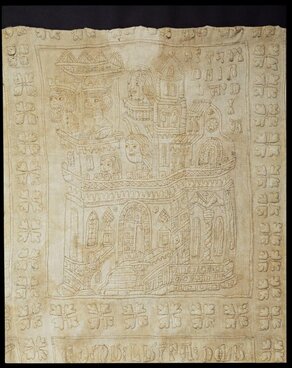
Picture from booklet. I based my fabric layout, stitching and braided "lattice band" placement on this drawing.
My translation said a "lattice band" was attached to the front edge and used to tie behind the head (presumably under the hair). I decided this lattice band is probably similar to the braided tape demonstrated in this same booklet for the necklage braid; this is an 8+1 braid. I made the decision to use a matching off-white wool in a 2 ply to construct this braid, as if it was for use in the necklage or head wrap braid. I have not seen the veils being constructed with contrasting color bands.
Using a whip-stitch to attach the braid to the front edge of the veil/hood and hide the stitches between the strands of the braid, this braid tape securely ties the veil to the head. It is possible this band is supposed to be sewn to the inside of the veil and not visible.
This is something I shall continue to research and will experiment with in future veil/hoods.
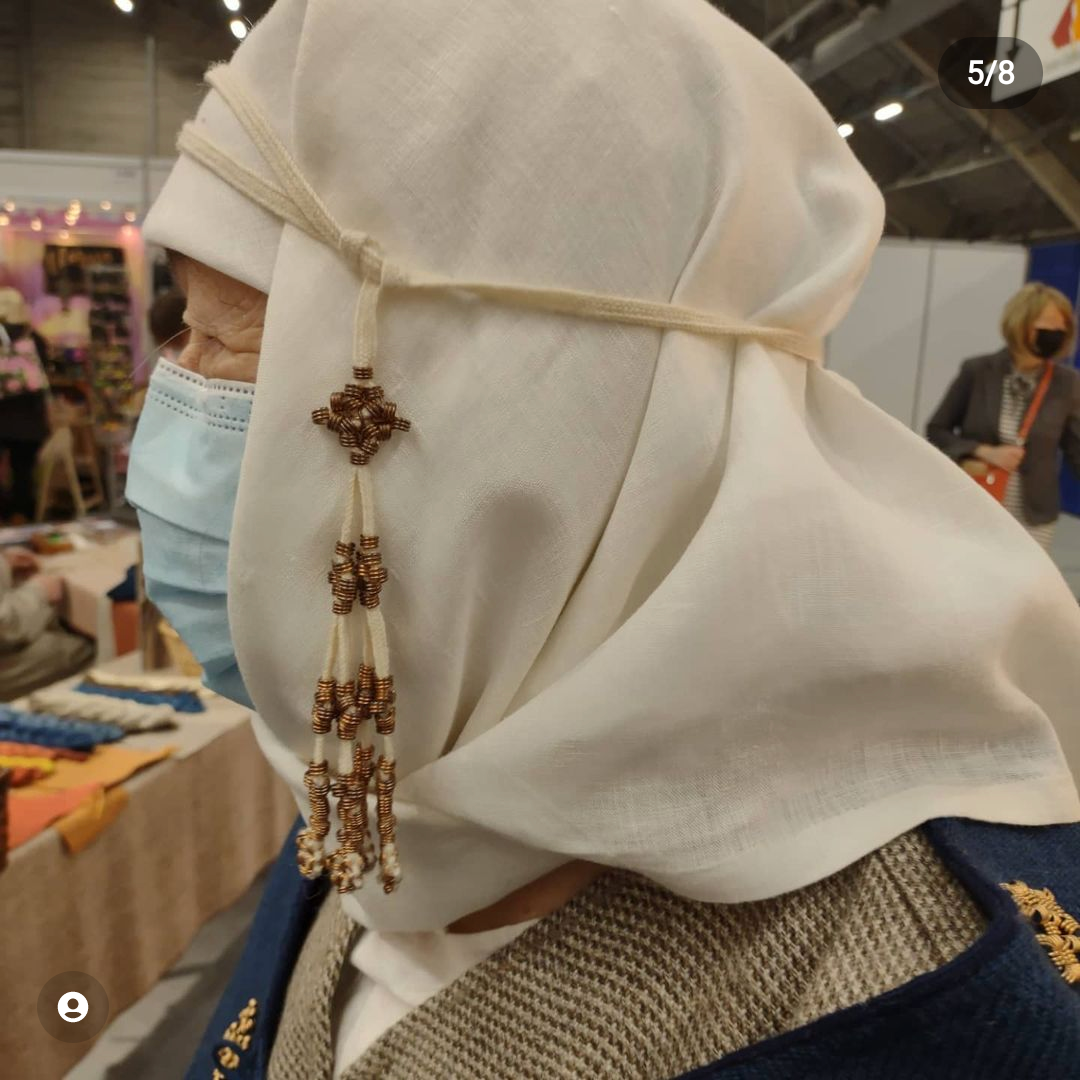
(I will make another in depth post on how to accomplish the 8+1 braid, and the details associated with it at another time. It is a similar technique like what is used for the 16+1 braid for the head wrap with the bronze coil adorned temple dangles, but this smaller braid uses a different pattern.)
ConclusionsFor a summer weight veil I think this will work perfectly. I feel it provides the correct look for my persona in shape and color. Also surprisingly it mimics the drape of the wool reconstructions I have found in source pictures from the Ravattula, Pernio and other Finnish national costume projects. (The originals are understood to have been 2/2 twill woven wool, and are shown in reconstructions using a variety of colors like white, blue and umber.) I am pleased with my version even though it departs from a "perfect" reconstruction in using loose weave cotton instead of a 2/2 twill wool; I believe this will make wearing my veil/hood in my current climate much more enjoyable. I do plan to create a wool veil/hood as well. and next time my stabilizing stitches will not be spaced as far apart. Enjoy this slideshow which includes pictures from above, and what my veil looks like with pieni (small) Rikissa's head wrap with bronze coil temple dangles. So probably one or two years ago now I bought some lovely wet spun linen and decided okay I am going to weave an apprentice belt so that I have a leather belt and also fabric belt for all the different kinds of clothes that I love to wear.... Recently my family took a trip to Washington DC which for us is about a 10-hour drive including stops. Instead of working on my St Bridget's cap, which in hindsight I probably could have finished on the trip,... I decided now is the time to work on this belt. In a vehicle, on a trip. In many Finnish Iron Age finds twill woven (over two, under two) braided bands have been found. These are always woven in odd numbers of strands; for example the Perniö and Ravattula Ristimaki finds for the headpieces with Temple decorations are 17 strand and 13 strand braids, respectively. These braids are used for head bands/temple ornaments, belts, etc. This technique is not new to me at this point in my journey, I've done multiple projects now with it but for some reason in both the trip up there and the trip back, so we're talking 20 hours-ish, this project just would not start. It was either the three colors together looked muddy in the braid with not enough contrast, or one of the three colors was... wrong. The lightest color was also a smaller size so that may have contributed to the off-ness. Now three colors are typical for the belts using this braid especially the ever popular Finnish use of red white and blue in motifs. I finally started the braid with the thinnest one and got about 2 in and it just does not want to be this braid... I don't like the look of it, it is too skinny (because at this point it was down to 11 strands), and my frustration factor is up to I give no more spoons. I did not want to measure and cut more strands. I was done. So, after 20 hours of work- a lot of which was measuring 33 lengths of string, and getting them organized and paired up and then going back because the one color muddied the mix and blah blah blah on and on ... this poor project is just a non-start. 20 hours of work I shoulda coulda been finishing a Birgitta's cap and all I would have had to do was remind myself where I was in the project ... because it's been probably 3 years since I started that one lol So what did I learn from this... Hand sewing projects are best for the car number one. If this had been a single color braid like white or red for the headpieces it would have been done. Also for this project and the way that this braid twill is woven I don't think the linen is the right material ... Which funny enough would not have been the material that they were braided with in the iron age either lol All of the analysis I am aware of fiber finds with this braid style show the yarns are woolen. In the finds, if there is plant matter it is in the weft of the weaving, typically of tablet woven bands. Moving on from here I will take these linen strands and try to tablet weave a pattern with them and if they are still muddy well then maybe I'll weave them into a hand towel. It is okay for projects to fail. It is okay for projects to be a non-start. It is okay to create something else. These are simple tablet woven bands, done with a pattern threaded in to the 8 cards.
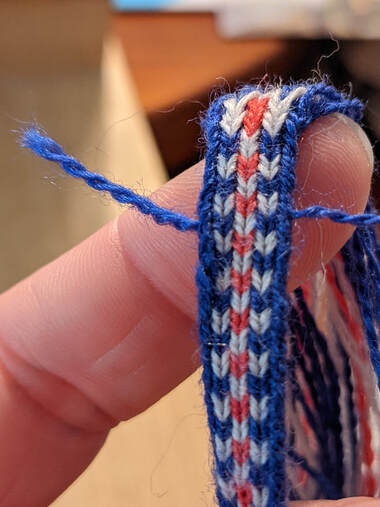
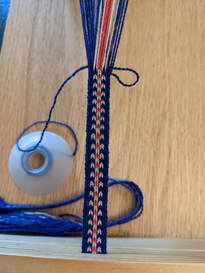
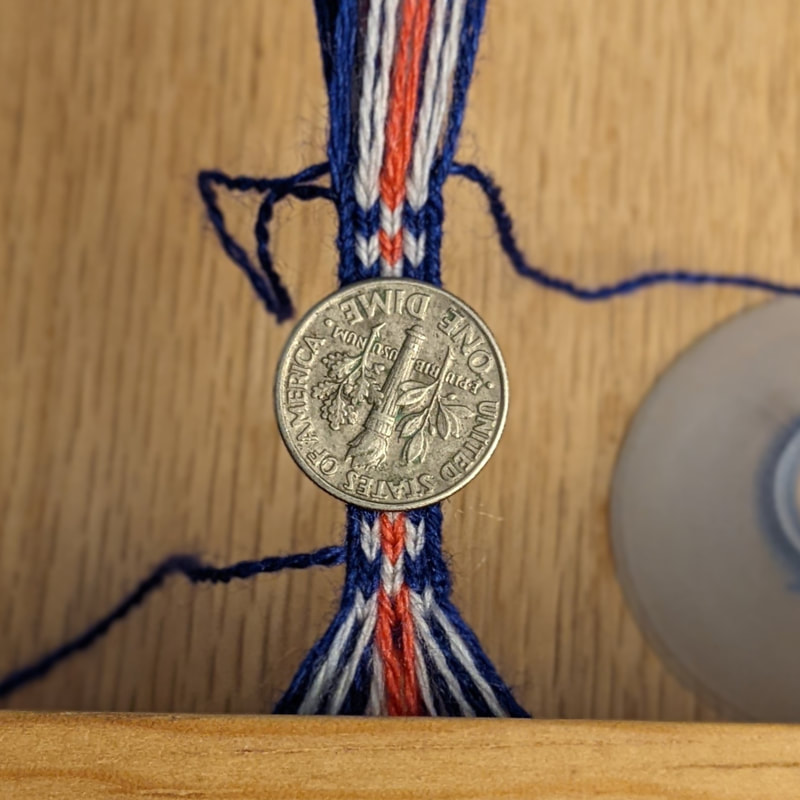
I say these, plural, because while they are the same pattern one band is 6mm wide and the other is 3mm. So tiny!! I can't wait to see how close I can reproduce them. 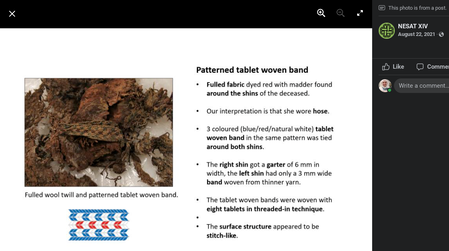
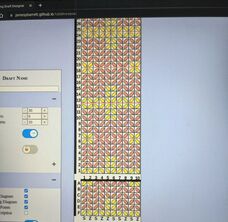
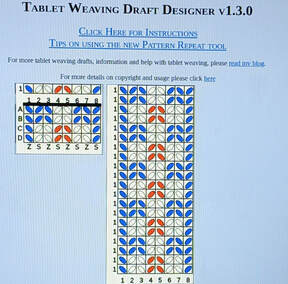
I used the tablet weaving designer at https://jamespbarrett.github.io/tabletweave/ to make sure my thoughts of how to pattern it were correct; for example which threads are S and Z twist, colors, etc. Hey, guess what? I got it on the first try, and made sure to check with the pattern repeats. Taa-Daa! Now, putting it in to action...
At 10 mm wide this band is too wide for my specifics of a recreation. This is due to 2 extra border cards not in the original band, tension.& possibly also yarn size.
I patterned this one off of a recreation I saw that Mervi Pasanen posted in a FB group. I knew it had 2 extra border cards, but since she is an expert, I thought it was a good place to start and try my pattern theory. But I decided I wanted it more precise.
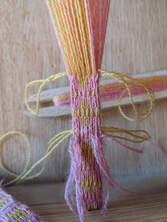
Plaited tassel ends and Bronze coilsTo finish these sock garters, the end of the bands were found to have plaited tassels and bronze coils.
Aug 7, 22 I have a migraine and will finish the rest of this descriptions at a later time. These tassels are really cool. the create tubes! I totally want to dish on these when I can read what I am typing. oopsiesaug 7, 22 I made an oops when switching for moving the band/ changing tension and I will expand on this more once the migraine is gone.
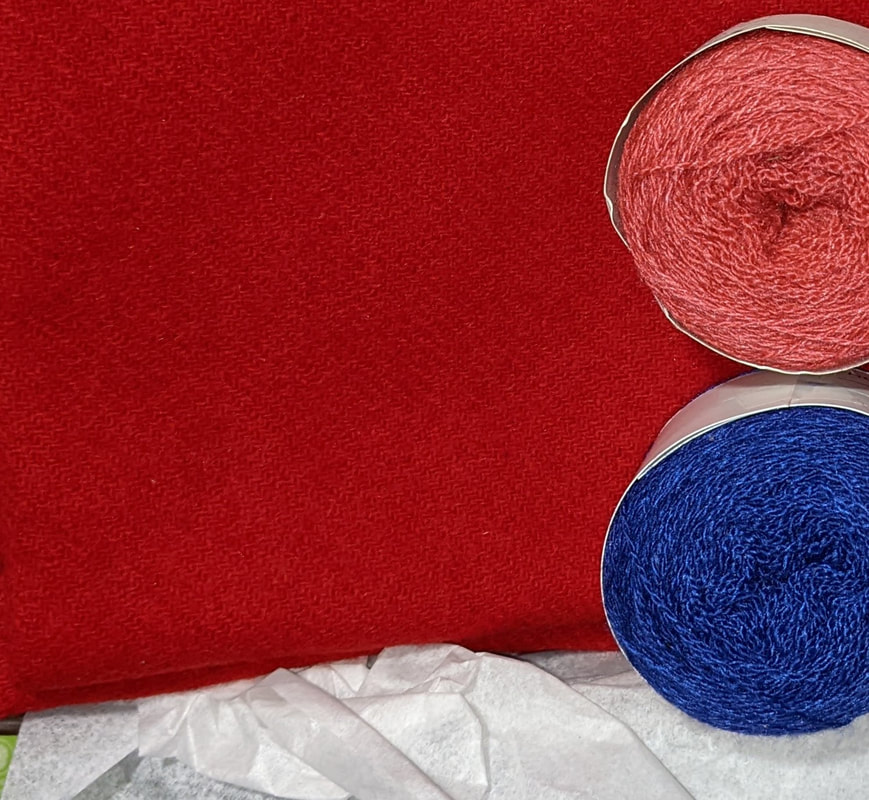
An exciting item found in Ravattula Ristimäki Church in grave 41/2016... a discovery of madder dyed, woven wool socks! This may not sound very exciting, because… socks. However, the exciting bits are that they are woven, instead of naalbound, and they are dyed with madder, which confirms much earlier trades than thought before.
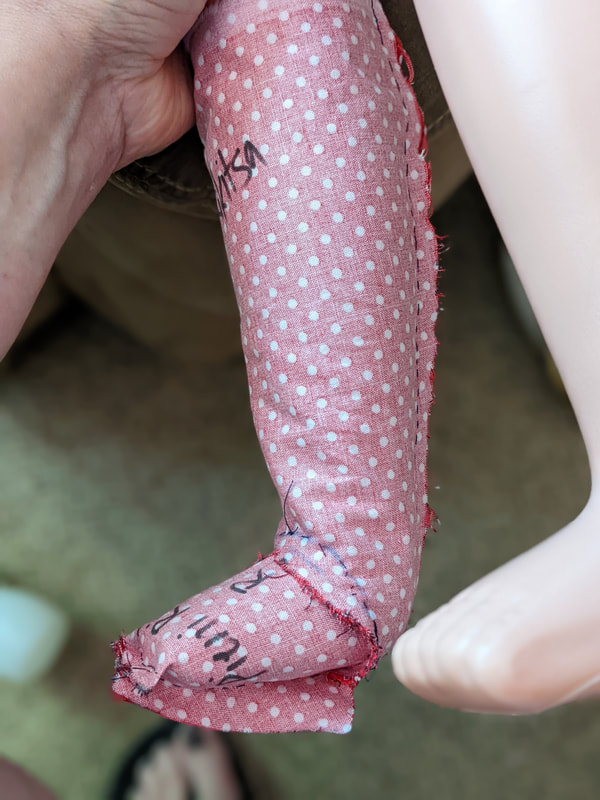
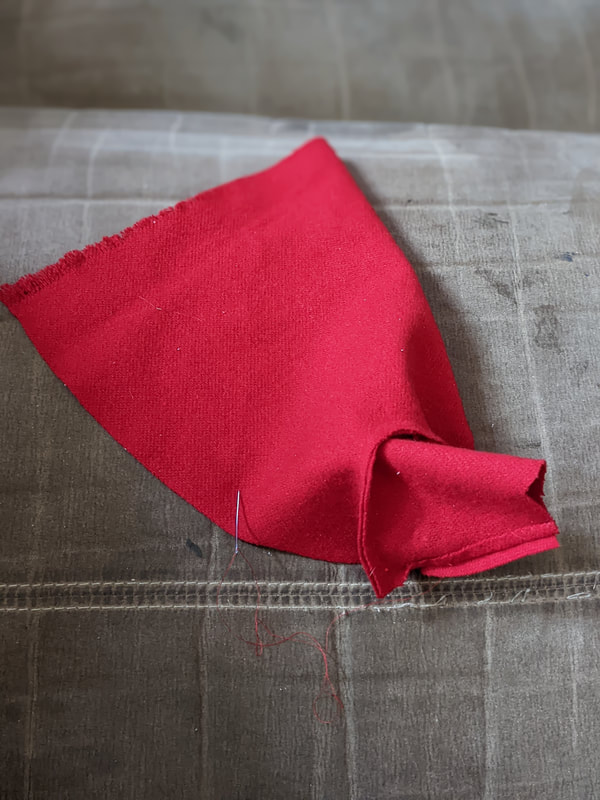
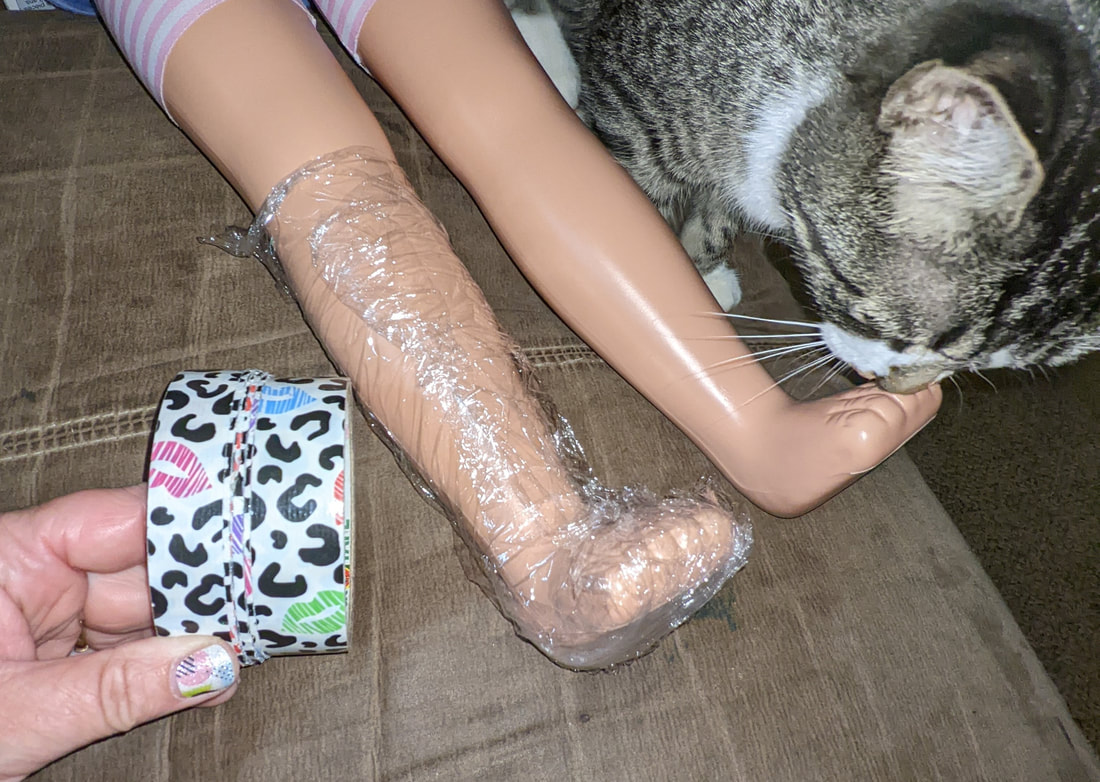
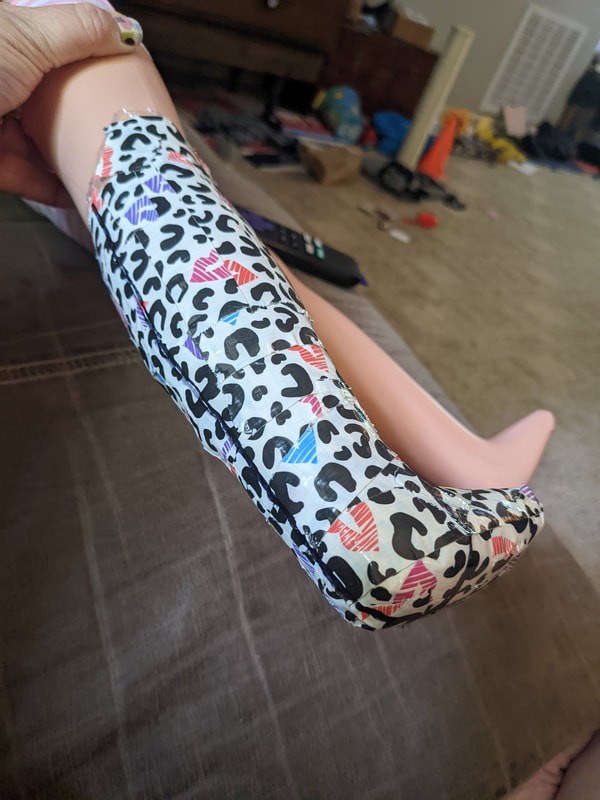
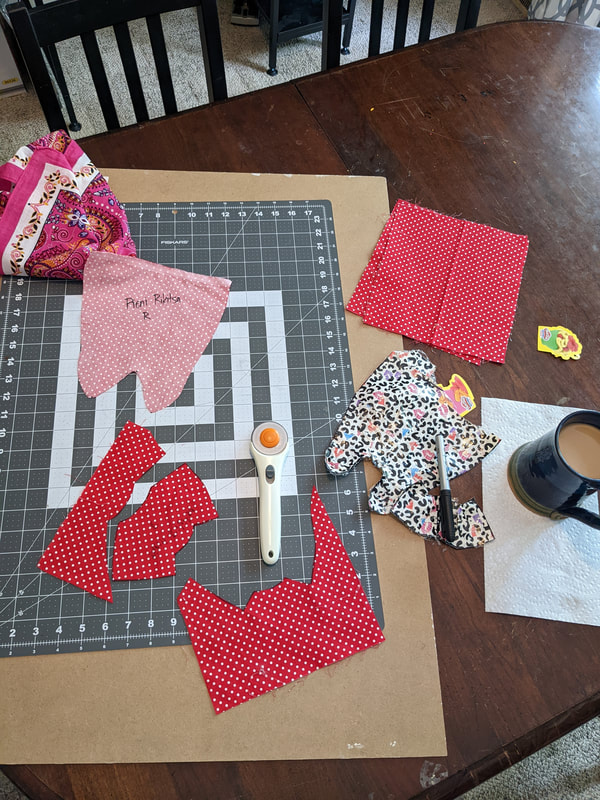
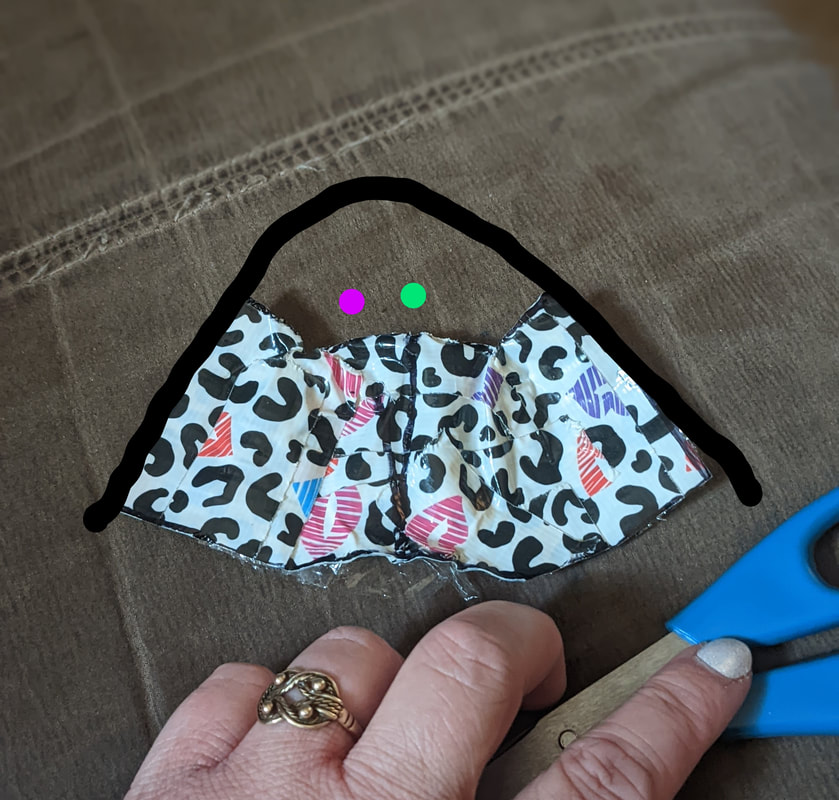
The original weave of the fabric is a 2/2 twill. I have used a plain 1/1 weave for the pieni (small) doll socks. I have 2/2 twill wool for my adult human sock creation. Only the top of the socks has survived so the actual construction shape is unknown. I have drafted two patterns based on the London hose pattern and an alternative tweak; walking on seams does not sound comfortable to me. (Turns out, after creating and wearing my linen London Hose style socks- they're quite comfortable! maybe even adding a modicum of padding. I made these socks post this project.) The following links places I sourced information on socks. There are patterns available from many places, and if you look on You Tube you'll find tutorials as well. But this is where I got most helpful info, including period examples , book pictures and references, and how-to's. MAKING MY PATTERN FOR PIENI RIKISSAHelp from our little Kisu... "why are you wrapping this doll in plastic and tape mum?"
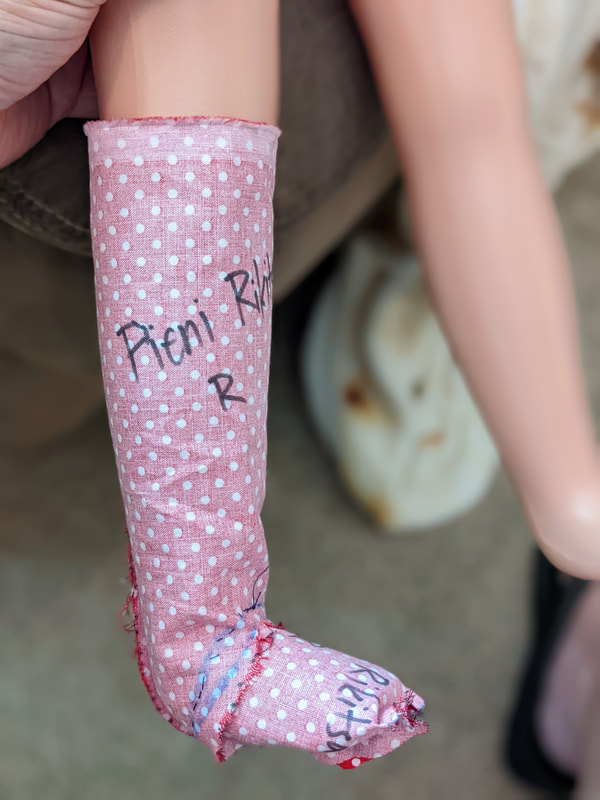
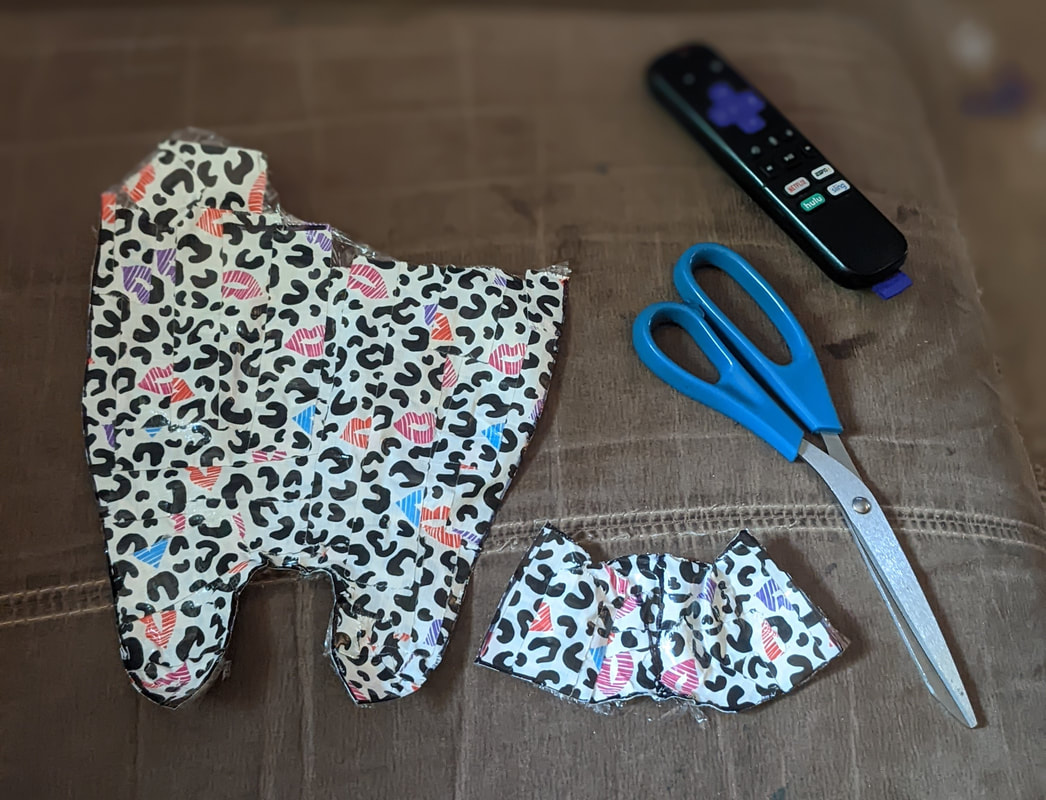
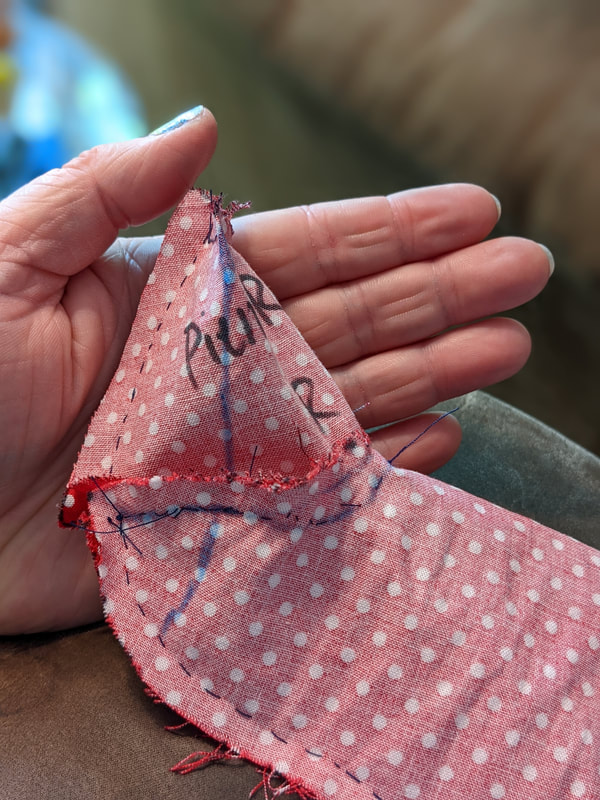
Using knowledge I had from prior projects I decided making a duct tape mold of pieni Rikissa's foot and leg was the best option to make a pattern. See, not only is she (the doll) small child sized, much smaller than I, but... she doesn't have joints! First I did the duct tape mold, then used that as a pattern to cut a cotton test piece. I mean, why waste the beautiful red wool if it didn't work?!
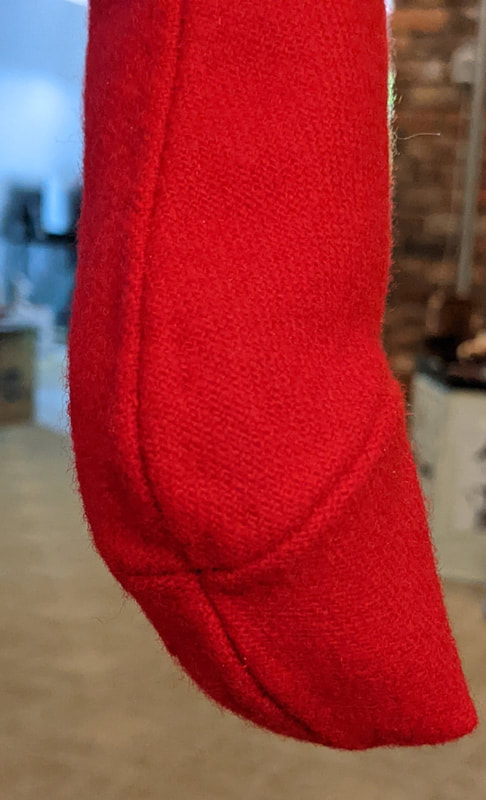
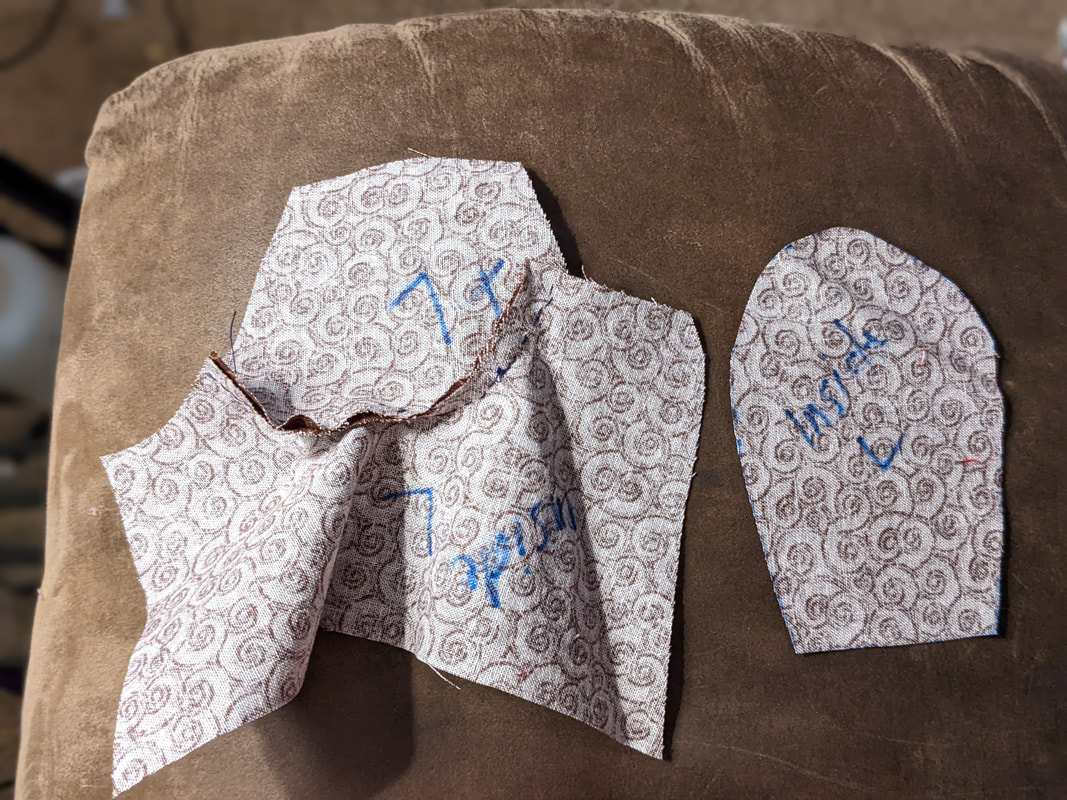
Doll Sock FITTINGIt totally worked! Sewing the London hose pattern together was much easier than I thought. I added too much seam allowance to the toe piece and it was too wide, so that needed some minor adjustment for the final wool sock pattern.
  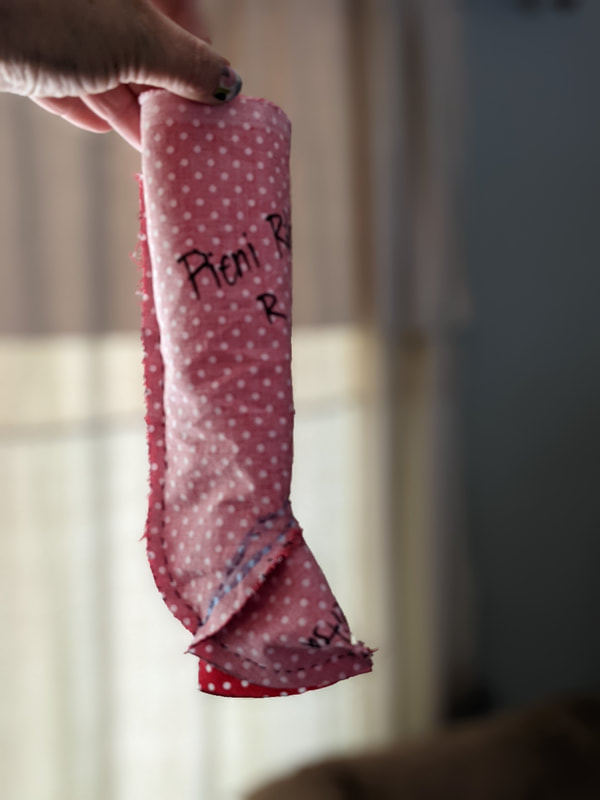 Also since I was unsure of the bottom seams I then drew the bottom piece for the second style, then used the cotton pieces to cut the second (brown) pattern. I chose to do this 3 piece style because I did not want to insert itty bitty side gores on a doll sized sock, and this style still accomplished the goal of no bottom seams.
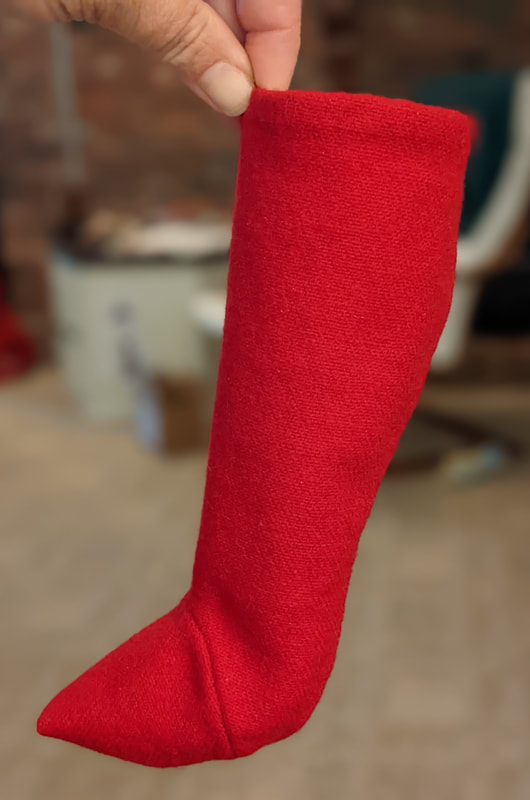
RED WOOL SOCKS, PART 2London style sockI wanted to hand sew these socks, one because of their size and two because I'm attempting to "up my game" to be more accurate. I blame Magnifica Sylvie la Chardonierre... with much love. hehe
Wool thread in red was not easily found, nor was I able to pull threads and use those for the sewing thread. So, I chose to use red silk thread. Oh my Goodness. How lovely is THAT. If you haven't sewn yet with silk thread... DO EEET. Like warm buttah. Since I wanted flat seams and period stitches I used a "spread seam" like seen in the picture below. A great source I used was from a downloadable PDF called "Stitches and Seam Techniques." Follow the button below to find it. I had no need to fold under the raw edge of the wool, since this wool was not fraying and the raw edge would be cast over by my stitch anyway. this worked great! 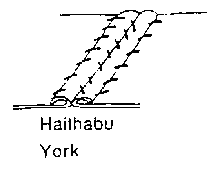
       VERSION 2 SOCK, 3RD PIECE FOR SOLEI actually found this pattern choice to be more difficult to make. I suppose that explains why more period correct patterns had the gores. Because of this I decided to make MY socks using the London Hose two piece sock style.
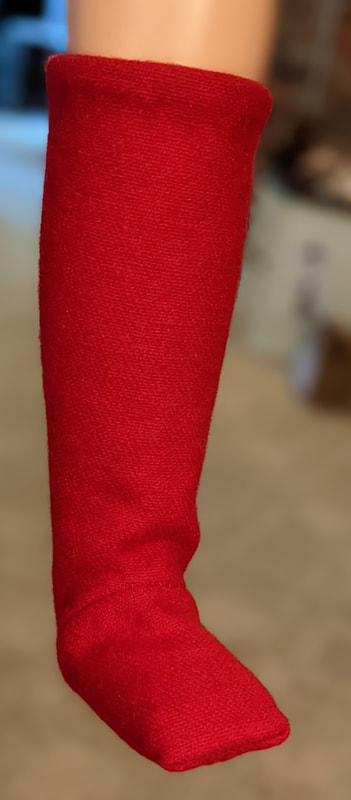
The seam treatments were the same for these as the London style.  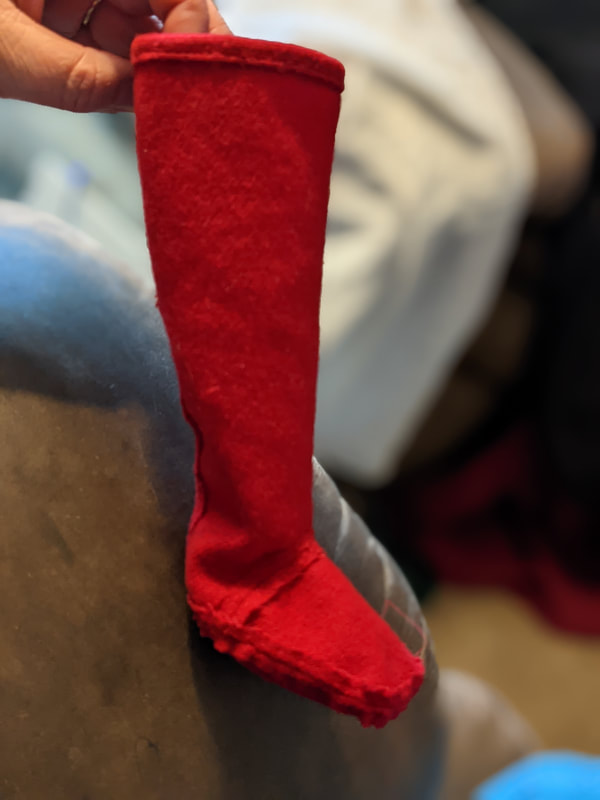 conclusionsLook at these super cute socks!!! These are the totally finished complete socks, including the garters from Ravattula grave 41/2016. (There is a separate blog post on the garters here.)
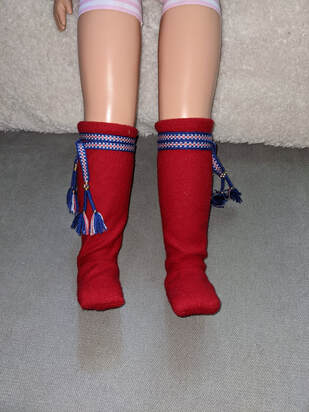
As I said above, from sewing these two separate patterns I decided, let us chance the seams on the bottom... it's easier to sew! SO.... sew I did. Before sewing MY pair of socks out of my beautiful, correct, 2/2 twill wool.... I thought. HEY I live in the Southern US and wool socks seem really hot. It is May after all and the hot humid is almost upon me. OH! I've got this really pretty orange linen, I'll make my socks from that! So... thus began the process and patterning for my feetsies. and THAT is another blog post. |
AuthorYep, still me. Archives
September 2023
Categories |


 RSS Feed
