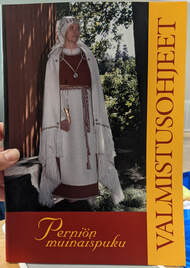
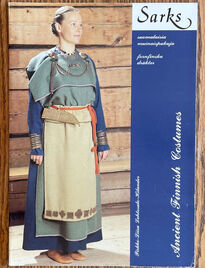
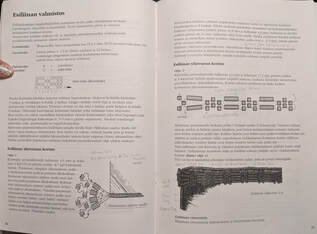
Rikissa's Research Ramblings
  • Home
  • Ravattula 41/2016 Project
  • Blog: Arts & Sciences
  • About Me
  • Atlantian Persona Challenge
  • Contact
  • Sources

A Golden Perniö Apron

6/14/2023

0 Comments

 
I've been focused on my recreation of both the pieni (small) versions and my size recreations of the Ravattula Ristimäki 41/2016 finds... with side quests of garters, and scribal, and this golden apron based on the Yliskylä finds in Perniö, Finland that date to the 12th century. 
Picture
I'm laughing because everything I'm doing is precise, with calipers to measure wire size, and bronze coil diameters, and length... but the color for the aprons ... WHOOSH! Out the window!
I first made the pieni Ravattula 41/2016 style apron (the small white apron pictured)... but that one is white instead of blue because I was so excited to make it I rushed in and didn't dye the wool. I mean... surely not everyone's apron was the same color... we know they weren't... so ... aaaaanyway...
​This golden apron is done in the Perniö style and is yellow instead of the white as was created for the 1925 costume.
Picture

... but is it the wrong color?

The researchers of Ravattula Ristimäki have done incredible research and testing down to the colors, size of hairs, breed testing of the wool, and testing the fabric fragments found in the inhumation graves.
(Thank you! If any of you ever read this, I for one am VERY appreciative of this work!)
But as far as I am aware, this type of research was not done on the Perniö finds. (Um... did the technology even exist? mmm NO. Not then in the 1890's and early 1900's. And I'm not sure if it could be done now either ... meaning I know some archaeological pieces from ancient Finland have been lost, in particular some tablet woven bands. But the Perniö booklet does say in the 1980's some further info was garnered with new research that changed the understanding of the belt band colors to red/white instead of red/yellow. in the Forward
Picture
"[The Perniö costume shown in the Perniön muinaispuku booklet] was reconstructed for the Nordic Archeological Congress in 1925, and it was made according to the instructions of Hjalmar Appelgren-Kivalo, who was then the head of the museum." pg 22
Picture
Another helpful source: below is a helpful link to a pdf on the Iron Age Finland Facebook group... Grave 6 at Yliskyä in Perniö.pdf by Diane Lyons Hedström,
aka Duchess Siobhan, OL.
Picture
My pieni Ravattula 41/2016 style apron, with accurately sized coils and brick pattern bands.
Picture
Finished, adult sized apron. 39 cm wide (15.25") and 87 cm long (34.25"). Though not the 50 cm width the booklet calls for, I used the whole fabric width and these were/are customized to an individual.

"Uncertain details"

Sarks: Ancient Finnish Costumes (link from the Viking Answer Lady and cover shown) talks about the history of the Perniö costume and the research of Iron age Finnish finds, plus some on archaeologist "Hjalmar Appelgren(-Kivalo)  [who] excavated at Yliskylä in Perniö.​"pg 19 
"Since [the Perniö costume] was not made according to one grave only, [and it was made for the exhibition, and therefore there are details in it which were not studied thoroughly pg 27], it gives the general idea of the costume of the late Iron Age and particularly Appelgren-Kivalo's opinion of it." pg 27 "Only the model of the mantle and the apron could be based with certainty on the grave finds." pg 27              --Well why is that??-- 
"The aprons in the Perniö graves were bordered with [bronze] spirals round the edges, so that their size is rather easily measurable. There is at the waist a broad spiral ornament, for which cloth has also been preserved, and the apron corners have been decorated with small fan-like ornaments."pg 22
These fans are what I call the "duck feet" on corners ... I'm not sure where I first heard that description, but I think it's silly and I like it.
"The finds from the Perniö grave 1 seem to contain a dress with a totally straight upper edge. It could have been sewn together at the shoulders or it could have been fastened with an iron pin
found in the grave. But there were no knife or brooches in this grave. Appelgren-Kivalo, 
however, has fastened the dress front in his sketch with a penannular brooch. Why? Can we be
sure that his sketch of the dress in grave 6 was based on carefully studied details, when this other 
dress has been improved with quite imaginary objects?" pg 27

Interesting to think about, eh? And certainly something to consider when reading sources and such. All of that to say... I didn't make it white like the booklet and the 1925 reconstruction shows. 
​ And I feel like that's A-OK. :)

Materials

I began this apron before I had my hands on the book Löydöstä Muinaispuvuksi (NEW! 2021) which covers ... umm, well, everything. I couldn't wait any longer for the English version and decided to use my translation muscles. The authors did a wonderful job and anyone that is interested in creating the clothing of ancient Finland will want a copy, even in Finnish! So I used what I had to proceed- the Perniön muinaispuku booklet, documents and discussions from the Iron Age Finland FaceBook group, lectures by Mervi Pasanen, pictures of pieces in museums and so forth. The problem with the Perniön muinaispuku booklet is many of the instructions and how-to's, well, some are now recognized as incorrectly interpreted (like the forehead dangles instead of temple ornaments). The booklet still contains great pictorial information and instructions, and I use Google Translate, and logic to translate Google translate, to understand the descriptions.
I know from previous knowledge absorbed through these sources that wool, particularly 2/2 twill but also other twill and plain weave too, seem to be what the majority of Iron Age Finnish clothing is made from. Though newer research points towards the possibility that the under layers are made from linen/or plant fibers. I mean... itchy bottoms from pokey wool? no thanks. 
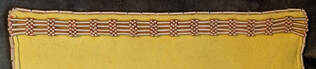
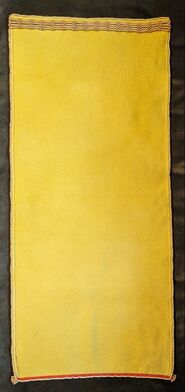
And, just like the crewel embroidery wool from SAFF that I used for the Codex Manesse garters, and the brick pattern bands on the aprons, I got this twill wool cloth at SAFF too. This is a 2/1 twill, of a light weight merino wool, in a beautiful golden color that is achievable through ancient dye stuffs.
Picture
Åland sheep have a double coat, as do most primitive breeds. Here is an example from Josefin Waltin, link included.
​
​In period, especially SW Finland, the Åland sheep may have been a popular breed. More breed information
 here by (I believe) Josefin Waltin; "The belief used to be that Åland sheep were related to the Finnish [sheep], but genetic examinations have shown that Åland sheep is its own and unique breed. It is believed to belong to the most primitive breeds of the Northern European short tail sheep." However, since I do not weave cloth (yet!) and did not commission custom cloth, the twill from SAFF made a great starting base.
I chose to use the golden yellow because... it's my favorite color. That seemed like a good enough reason for me, especially since it is​ a color achievable through period dyes and mordants. 
The coils are strung on a braided cord, that is then stitched onto the apron's borders. If I understand the  Perniön muinaispuku booklet, it says make an 8 strand cord the circumference of the apron. pg 17 In a discussion with Mervi Pasanen she recommended a basic braid, like a 3 strand; this is what I did and it is plenty strong.  Also, in the 1925 costume they used mercerized cotton for these cords; I used wool as it is now recognized as the proper material and has been identified in other related SW Finland archaeology.
Picture
Approximated tubular selvage (not yet pressed here) and the first color of brick pattern tablet woven band.
For the coil string, I tried to match the fabric color to the wool thread I had on hand since I didn't have the warp or weft threads to match. The exception here is the red cording I used for the applique piece at the waist; I used the same red wool as the brick pattern tablet band. Red wool has been found as the threading for other applique pieces and I thought it added symmetry.
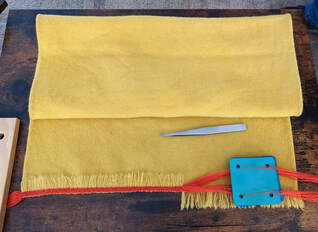
Picture
Perniön Muinaispuku booklet, pages 16 and 17
The coils for the apron I made by hand with the coiling gizmo-thing-a-ma-bob with 22 g bronze wire. As I said above, I used calipers to measure both the wire size and the finished coil diameter and length so as to match the dimensions for all areas of the apron as described in the Perniön muinaispuku booklet.
To help others who do not have the info or translations ...
For each duck foot: 4 of 4.0 mm dia, 8 mm long, and  7 of 4.0 mm dia, 4 thread coil beads
​Top edge of the apron: 4.6 mm dia, 16.8 mm long
For the sides and hem: 4.6 mm, 14 mm
For the applique at the waist: 4.0 mm dia, 17.2 mm long, and 4.0 mm dia, 4 thread coil beads. 
Picture
Here (center) is an example of a 4 thread coil "bead" (greatly zoomed in as it is only 4.0 mm in diameter); 3 thread beads are also shown.

Making the Apron

​I did my best to approximate the tubular selvage edges found in most Iron Age Finnish finds; As it turned out this is the guidance provided in the Löydöstä Muinaispuvuksi book if you cannot weave your own cloth, or have it woven for you. This was done simply by making a very narrow hem on each edge; though I did pull some warp threads to help give the appearance of the pattern for a tubular selvage. (I'm not sure I would do this again. it doesn't add enough of a difference to be really noticeable.)
Picture
The warp of the cloth becomes the weft of the tablet band. It is generally agreed they would be of the same yarns and match the cloth, unlike my creative choice.
Picture
After the brick pattern band to finish the fabric is complete, the "duck feet" ends are then made on both ends of the band on either side of the apron.
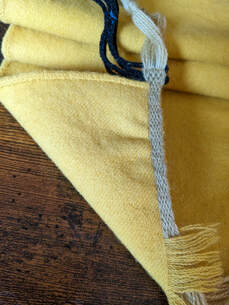
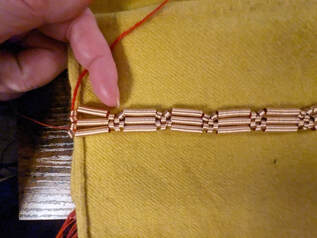
See in the picture with the tan colored brick band? See the wrinkles? That means the band tension was too tight... so I wanted to re-do the tension... and besides, that grey/tan color was bland and bleh. High contrast there I went! Red I knew would work well, since the tablet woven band that accompanies this apron is white and red. (But I didn't know until after the project was done that the original interpretation of the belt was yellow and red.) To my modern eye, I much preferred the red/yellow contrast.
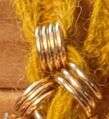
All the coils were next

You know how sometimes you can get so focused on a project you miss details? or as the saying goes, you can't see the forest for the trees? Well. Just as my applique piece was finished and I could start to attach it to my apron... I realized my applique did not match the pictures in the Perniö booklet or source pictures for how this applique looks; even though I followed the threading directions, which are pretty straight forward.
So guess what I did?! yep. I pulled all of the coils off, and started again on row 2. It really didn't take that long, and I really wanted it right.
Picture
Here I realized the coils were not matching. Though the directions give the general threading guidance. You can also see the basic braid used to string the coils.
Picture
Pre-planning helps ... this coil isn't matched to the others in the column, it's too long. I fixed this when I restrung the entire applique.
On row 2 I figured out the issue. aaaand, now after looking things over... I probably could have completed the original and then flipped it over. /facepalm There is the forest and trees part. However, if I had not redone it, I couldn't have re-organized and made better fitting, more uniform columns. So I still feel it was well used time and a good learning experience.
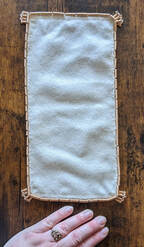
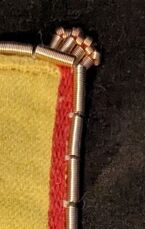
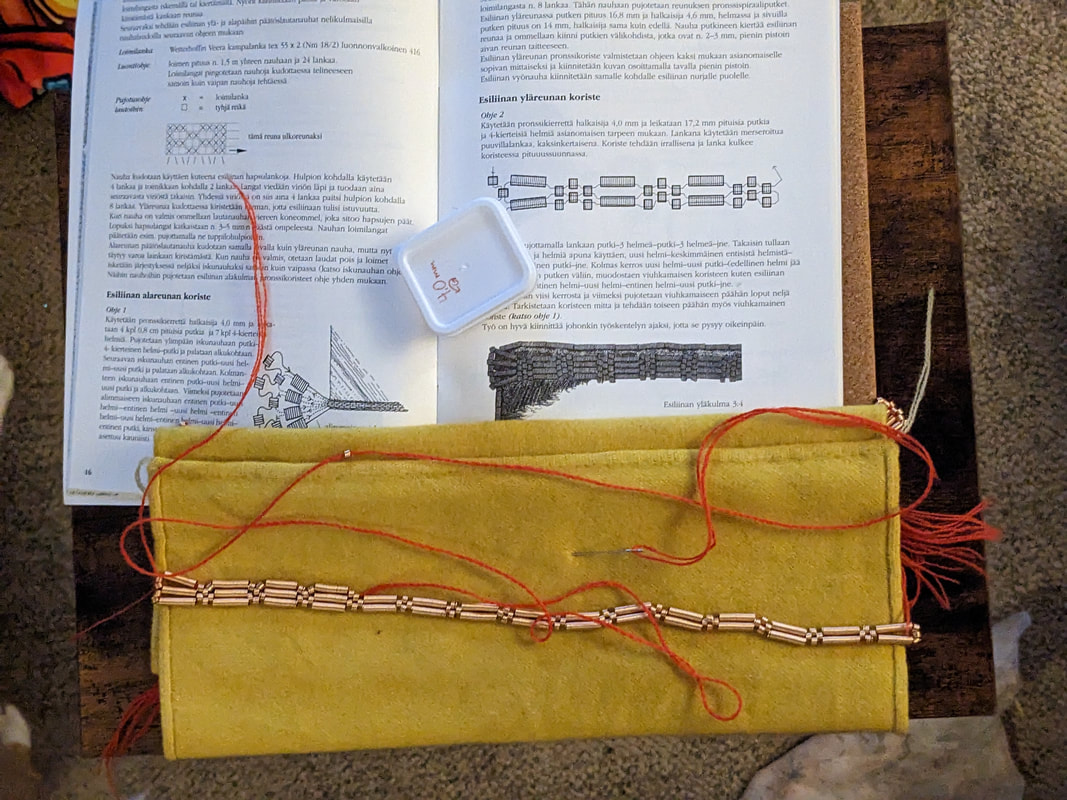
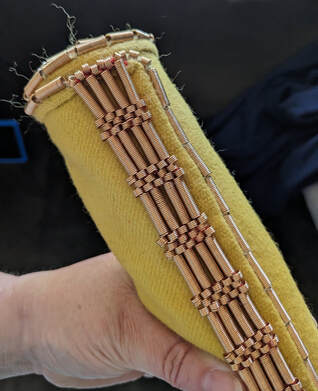
The applique piece is then centered and sewn onto the waist of the apron below the top edge. Because it is heavy, the goal here is to secure the applique piece in place and support the weight. I sewed this similar to how the edge coils are attached, by stitching down the cord that runs through the coils; the sewing thread/yarn also helps by providing extra support as it travels through the coils as well. Although, unlike the coils on the apron edge, a stitch was not needed between every coil bead.
I began stringing and sewing the bronze coils to the edge after the applique was attached. I did the top edge first, to make sure I used the proper sized coils, since they are different from the sides and bottom edge. These are also attached using the same method of strung on a braided cord, and then the cord is sewn to the edge. There are good instructions in the Löydöstä Muinaispuvuksi book, Mervi Pasanen's Instagram has a video, and the Perniön booklet does instruct that between coils is about a 2-3 mm gap for the stitch. pg 17

Now it is done! And heavy but definitely wearable. I really do like the way this ended up, and next is to weave the belt that was found with this apron to Finnish it off! teehee I love puns 
Picture
Picture
Link to original picture from Pinterest. I cropped the picture to focus on the apron and belt.
The tablet woven belt band that pairs with the Perniön apron is a lovely red and white checkered pattern. It is attached to the wrong/ underside of the apron behind the applique piece and then wraps around the body as shown in the picture.
Should we take bets if it is going to be red and white or a different set of colors?? LOL

what would I change... 

There actually aren't many changes I would make to this project. I'm pretty darned happy with the outcome. That signals a pretty good project, right?
If I were to do this apron again, I would want to do something so the applique piece extends over the apron edges farther and I could better fan out the end coils like the booklet sketch on pg 17. 
The most likely option is to add one more column of the 17.2 mm long coils to the center/width of the applique piece, and the corresponding coil beads, thus widening the applique. ​
I mentioned this at some point, but I did pull some warp threads on the fabrics edges to help give the appearance of a tubular selvage. As I said it doesn't add enough of a difference to make the time and effort worth it.
And, at some point I'll weave the cloth myself, with the tubular selvage edges, and matching brick pattern bands at top and hem. (I already have the blue indigo wool to spin and weave.)

if you made it this far, thank you. I know I included a LOT of information. but maybe this will help someone with their project in the future. :)

0 Comments

Your comment will be posted after it is approved.


Leave a Reply.

    Author

    Yep, still me.

    Archives

    November 2024
    January 2024
    September 2023
    July 2023
    June 2023
    December 2022
    October 2022
    September 2022
    August 2022
    May 2022
    March 2022

    Categories

    All
    General
    Weaving

    RSS Feed

Powered by Create your own unique website with customizable templates.
  • Home
  • Ravattula 41/2016 Project
  • Blog: Arts & Sciences
  • About Me
  • Atlantian Persona Challenge
  • Contact
  • Sources